REVIEW · ANTWERP
Private Tour: The Dark Side of Antwerp
Book on Viator →Operated by Legends Walking Tours of Antwerp · Bookable on Viator
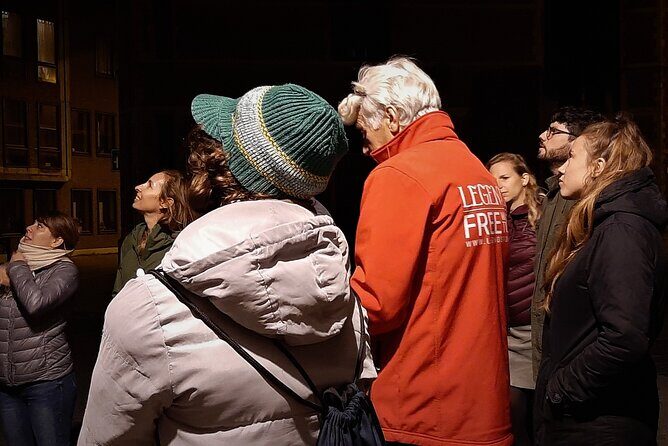
Antwerp has a darker side to tour. This private, story-led walk pairs diamond-trade commentary with real city corners like the medieval prison Het Steen. I like that you get personal attention (just your group) and that the route hits both famous squares and quieter places most people skip. One thing to watch: several key stops are marked as not included for admission, so you may need to budget extra if you want to go inside.
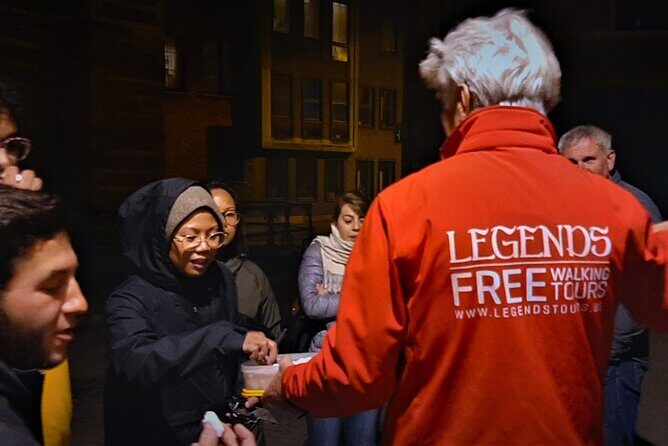
This is run by Legends Walking Tours of Antwerp in English, and it’s priced at $105.59 per person for about 2 hours. I’ve seen guide names like Luc D, Tom, Marleen, and Anna praised for strong storytelling and a friendly, adaptable tone, including help getting back to your hotel if you need it. Expect a walk that mixes atmosphere with explanation, and a guide who can adjust when you ask to skip certain parts.
In This Review
- Key things to know before you go
- Antwerp’s diamond story: where the tour’s mood comes from
- Starting at Grote Markt: the city center you can actually picture
- Cathedral of Our Lady: the skyline icon (and why the belfry matters)
- DIVA and the diamond trade’s double life
- Het Steen’s prison past: walking past a living artifact
- Museum Vleeshuis and Saint Paul’s Church: guild culture and major art
- The Red Light District at night, FelixArchief’s firebreak street
- Ending at MAS rooftop: port views and next-step ideas
- Price and value: what $105.59 per person really buys
- Who this tour suits best (and who might prefer something else)
- Should you book The Dark Side of Antwerp?
- FAQ
- How long is the tour?
- Where does the tour start and end?
- Is this a private tour?
- What languages is the tour offered in?
- How much does it cost?
- Are admission tickets included for the stops?
- Can I skip the Red Light District part?
- What if the weather is bad?
- Is the tour refundable if I cancel?
- When will I receive confirmation after booking?
Key things to know before you go
- Diamond trade, bright and dark: You’ll hear why Antwerp became the world’s diamond capital and what the darker side looks like in city life.
- Het Steen, former medieval prison: You pass (and learn from) one of Antwerp’s oldest surviving buildings and its prison-era functions.
- Places that feel designed for a purpose: The FelixArchief interior ‘street’ was built as a firebreak inside a former port storage.
- Art, faith, and Antwerp masters: Saint Paul’s Church is highlighted for keeping artworks by Rubens, Van Dyck, and Jordaens within its walls.
- A safe-feeling Red Light District walk: The tour includes it at night, with an option to skip on request.
- A panoramic finish at MAS: You end on the rooftop with port-of-Antwerp views and practical tips for what to do next.
Antwerp’s diamond story: where the tour’s mood comes from
Antwerp made its name in gems during its Golden Age, and this walk uses that fact as the thread tying everything together. The “dark side” angle isn’t just moralizing. It’s about how a trade can shape a city’s buildings, institutions, and even the way neighborhoods get used.
You’ll feel the shift in tone as the walk moves from big public spaces toward places that once served stricter roles—like incarceration and guild life—and toward spaces tied to commerce, storage, and maritime infrastructure. That mix is the point. You’ll get Antwerp as a working city, not just a postcard city.
If you enjoy walking tours that tell a story through specific locations, this one fits well. It’s also a good choice when you want less of the usual “top sights checklist” and more of the connections between them.
You can also read our reviews of more private tours in Antwerp


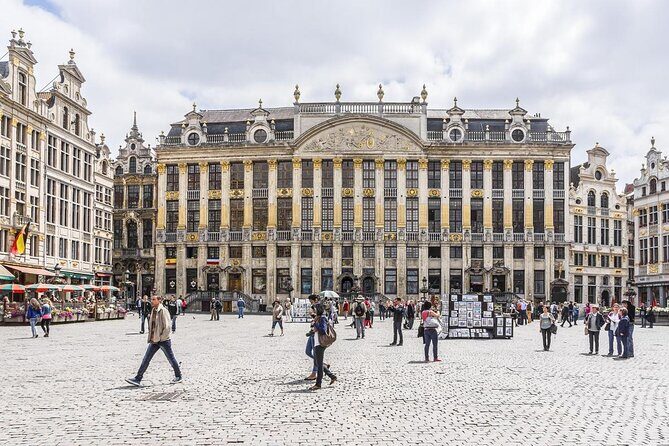
Starting at Grote Markt: the city center you can actually picture
Your walk begins at Grote Markt, Antwerp’s main square. It’s surrounded by medieval guild houses and anchored by the City Hall and the Brabo Fountain. Even if you’ve seen city squares before, this one works because it’s visually dense: the kind of place where legends and civic power show up in the same frame.
The best part here is the way your guide uses the square as a reference point. You’re not just looking at architecture; you’re building a mental map for later stops. Grote Markt is also where you’ll understand how Antwerp’s public identity formed—before the darker trade stories start putting pressure on that clean image.
You don’t need to worry about admission here. The square time is free-flow and easy to absorb.
Cathedral of Our Lady: the skyline icon (and why the belfry matters)
Next comes the Cathedral of Our Lady and its belfry tower—one of the iconic silhouettes people associate with Antwerp’s skyline. This stop is short, so you’re mostly getting context: where the cathedral fits in the city’s long arc and why the tower became a landmark.
A practical note: the cathedral stop is listed as not including admission. In other words, plan for viewing and explanation on the spot rather than expecting the tour to cover entry costs. If you want to go inside or climb the tower, budget accordingly and do it based on your own interest.
Still, even from the outside, the cathedral often helps anchor the evening. It gives you a “high point” in the visual story before the tour shifts toward museums and older, less glamorous buildings.
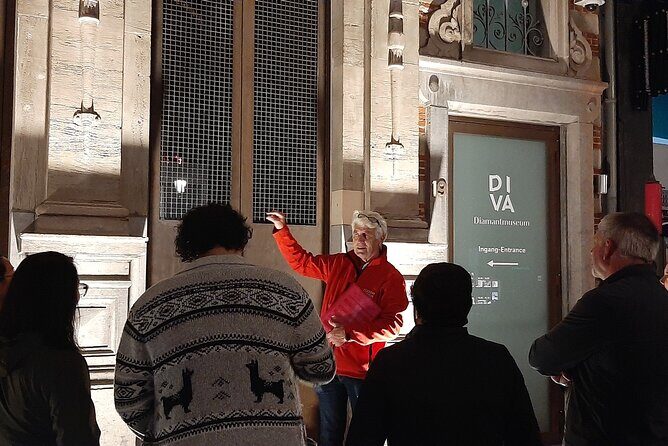
DIVA and the diamond trade’s double life
After the skyline landmark, the route turns toward DIVA, the museum that’s positioned specifically to tell the story of diamonds—both the bright side and the darker side. This is where the tour’s theme becomes concrete, not just hinted.
The time here is tight, so think of it as a focused orientation stop. You’re meant to leave with sharper understanding of why Antwerp became the diamond capital in the first place—and what that reputation cost, complicated, or concealed. If you like trade-history framing (how industry shapes everyday reality), DIVA is the emotional center of the whole walk.
Admission isn’t included at this stop. If you’re trying to control costs, you might treat it as a “go/no-go” based on whether museum entry is a priority for you. If you do enter, it’s the one place on the route where museum time directly supports the dark-side narrative.
Het Steen’s prison past: walking past a living artifact
Het Steen (the Steen Castle area) is one of Antwerp’s oldest buildings, and it has served multiple functions over the centuries—including as a prison. That’s a rare kind of lesson for a walking tour: you’re seeing a real building with layered uses, not just learning about an idea.
Your guide will share insights into what medieval prison life could feel like. Even if you only get a sketch of it, the effect is immediate. This stop changes the tour’s atmosphere from “history talk” to “history that had teeth.”
Admission here is free. The value is in the guide’s narration and your ability to connect the architecture you see with the role the building played. If you like darker, human-scale history, this is one of the most rewarding stops.


Museum Vleeshuis and Saint Paul’s Church: guild culture and major art
The walk continues to Museum Vleeshuis, described as the former Butcher’s Hall and the city’s oldest guild house. Today it tells a different story—sound, music, and dance. That contrast is interesting: you’re hearing about a place that once belonged to a trade world, now repurposed to highlight performances and cultural expression.
Like other museum-style stops, admission isn’t included here. If you’re the type who likes to see how a building gets reused, Museum Vleeshuis can be worth the extra time and cost. If you’d rather keep the tour strictly “walk-and-explain,” you can still use the stop for orientation and story context.
Then you’ll reach Saint Paul’s Church, which gets special attention because it keeps within its walls masterpieces by three major Antwerp masters: Rubens, Van Dyck, and Jordaens. This is a big deal in simple terms: you don’t have to travel between sites to connect these artists to the same place.
Again, admission isn’t included for this stop. Decide in advance how much you want to spend on entry. If your goal is to understand Antwerp’s identity through art and institutions, this is one of the stops most likely to feel worth it.
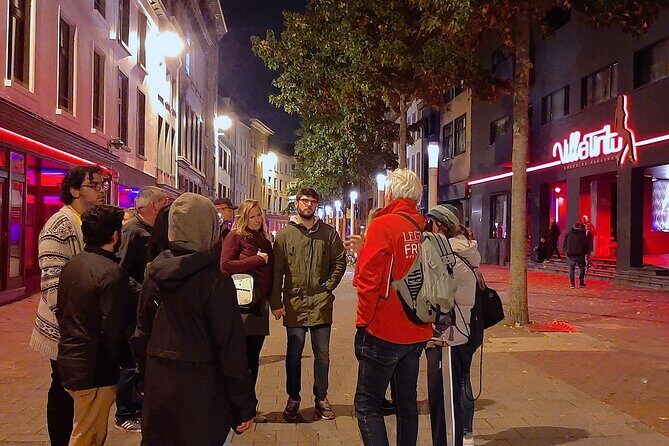
The Red Light District at night, FelixArchief’s firebreak street
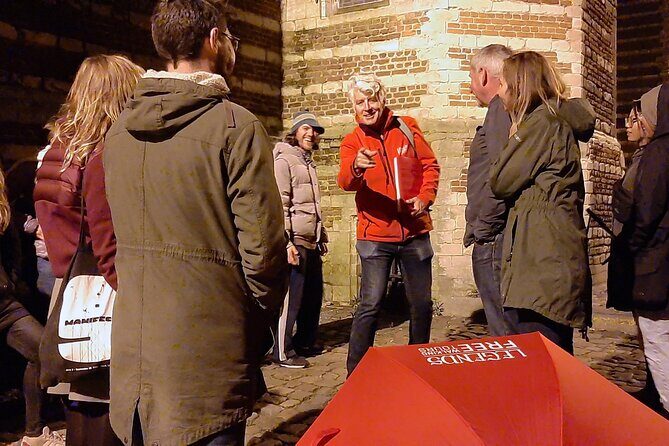
The tour includes Antwerp’s Red Light District and frames it as a safe area to walk around at night. Your guide can share some “spicy” secrets, but the key practical detail is that you can skip this section on request. That makes the stop easier to manage emotionally and logistically, depending on your comfort level.
Then you move to FelixArchief. The big idea here is that it started as port storage and now houses the municipal archive. The interior has a distinctive ‘street’ built as a firebreak inside the building. That’s the kind of detail you might never notice on your own, and it’s exactly why the tour works: it trains you to look at old spaces like they were engineered for specific problems.
FelixArchief is free to visit on this walk (no admission ticket required). Even without going deep into the archive itself, the layout and the firebreak concept help you understand how Antwerp’s port and storage needs shaped architecture.
Ending at MAS rooftop: port views and next-step ideas
You finish at MAS (Museum aan de Stroom) at the rooftop, with panoramic views and a strong focus on the Port of Antwerp, described as one of the biggest in Europe. This ending is a smart move. After the darker stories and tighter buildings, you get open sight lines and a clearer sense of how maritime commerce connects back to everything earlier.
Admission is free for this rooftop finish on the tour. And just as important, the guide uses the last stretch to offer recommendations—what to do next in Antwerp based on your interests.
If you’re planning how to spend the rest of your evening or your next day, this is where you’ll benefit most. You’ll leave with a sense of direction and a few targeted ideas rather than generic suggestions.
Price and value: what $105.59 per person really buys
$105.59 per person isn’t a bargain-basement walking deal, so I think about value in terms of what’s included and what’s not.
On the value side:
- You’re getting a private tour, meaning just your group.
- You get a tight story arc across multiple city locations in about 2 hours.
- You’re paying for a guide’s ability to connect places to the diamond-trade theme, including the prison-history angle at Het Steen.
- The last stop at MAS rooftop is free, and several other moments on the route don’t require admission.
On the cost side:
- Multiple stops are listed as not including admission tickets (including DIVA, Museum Vleeshuis, Saint Paul’s Church, and the Cathedral of Our Lady).
- If you plan to enter several of those sites, your total trip cost may rise beyond the tour price.
For couples, small groups, or anyone who wants a guided narrative without mixing into larger crowds, this pricing can make sense. For budget-first travelers, it’s best if you’re comfortable treating some stops as exterior viewing plus story, using paid entry only where it matters most to you.
Who this tour suits best (and who might prefer something else)
This walk is a strong fit if you:
- Like walking tours with a clear theme that ties locations together.
- Want Antwerp’s diamond story with the “dark side” angle, not only the glossy version.
- Prefer private pacing and the option to skip the Red Light District segment if needed.
It may feel like extra effort if you:
- Want a purely free sightseeing route with zero added admissions.
- Don’t enjoy museum context or short instruction stops inside/outside major sites.
Also, because it’s a walk and it depends on good weather, plan with a backup mindset for rain or chilly conditions.
Should you book The Dark Side of Antwerp?
Yes, if you want Antwerp to make sense as a working city shaped by diamonds, ports, guilds, and old institutions. The strongest reason to book is the way the tour blends recognizable landmarks with off-the-main-path places—then uses a guide to connect them into one story. Het Steen and the diamond-trade framing at DIVA are the two anchors that help the whole walk click.
If you hate paying for museum entry, you can still enjoy the walk, but you’ll need to accept that some stops are marked as admission not included. My advice: choose in advance which of those you’ll actually pay to enter, and treat the rest as story-driven viewing.
FAQ
How long is the tour?
It lasts about 2 hours.
Where does the tour start and end?
It starts at Grote Markt, 2000 Antwerpen, Belgium, and ends at MAS – Museum aan de Stroom at Hanzestedenplaats 1, 2000 Antwerpen, Belgium. You can add a note if you would prefer a different end point.
Is this a private tour?
Yes. It’s a private tour/activity, and only your group participates.
What languages is the tour offered in?
It’s offered in English.
How much does it cost?
The price is $105.59 per person.
Are admission tickets included for the stops?
Some stops are free to view on the walk, while others are listed as admission ticket not included (for example, Cathedral of Our Lady, DIVA, Museum Vleeshuis, and Saint Paul’s Church).
Can I skip the Red Light District part?
Yes. On request, this portion of the tour can be skipped.
What if the weather is bad?
This experience requires good weather. If it’s canceled due to poor weather, you’ll be offered a different date or a full refund.
Is the tour refundable if I cancel?
Free cancellation is available. You can cancel up to 24 hours in advance for a full refund. If you cancel less than 24 hours before the start time, the amount paid will not be refunded.
When will I receive confirmation after booking?
You’ll receive confirmation at the time of booking unless you book within 5 days of travel. In that case, confirmation is received within 48 hours, subject to availability.