REVIEW · BRUGES
Private Historical Tour: The Highlights of Bruges
Book on Viator →Operated by Legends of Bruges Free & Private Tours · Bookable on Viator
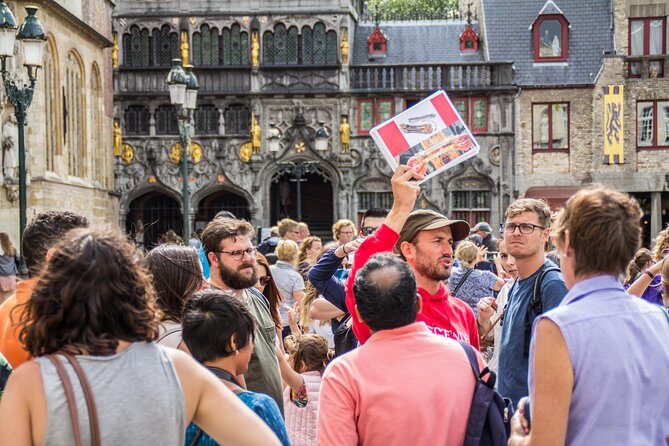
Bruges clicks when a guide sets the scene. This private walking tour focuses on the city’s power points, from the Markt to Burg Square, with an English-speaking guide who explains the people and politics behind what you see.
You’ll get hotel pickup and drop-off, so you’re not wasting time figuring out where to meet in a maze of canals. I also like that the tour is built like a guided route through big landmarks and the small details between them, which makes it easier to plan the rest of your day.
One thing to keep in mind: the time window is tight (about two hours), and several stops involve optional paid entry such as museums and churches, so you may need to pay extra if you want to go inside at every stop.
In This Review
- Key Highlights You’ll Notice Fast
- Private Bruges in Two Hours: How the Tour Feels On Foot
- What you should expect about pace
- Starting at the Markt: Medieval Trading Power and French Pressure
- Tip for your photos
- Belfort and the Halls Behind the Bellfry: Why the Tower Ruled the Middle Ages
- The tradeoff
- Gruuthusemuseum and St John’s Hospital: Wealth, Monopoly, and Care
- Practical note on museum and hospital entry
- Ten Wijngaarde Beguinage and Minnewater Lake: 800 Years of Community and Love-Lake Legends
- Why these two stops work together
- De Halve Maan Brewery and the Beer Pipeline: The Fun Side of City Nicknames
- What to expect if you want more
- Onze-Lieve-Vrouwekerk: The Brick Tower, Michelangelo’s Statue, and Burgundy Power
- The cost reality
- Groeningemuseum Garden and Huidenvettersplein: Art Gardens and the Leather Trade
- Why these stops are worth the brief time
- Burg Square: The Political Heart and Where Bruges Took Shape
- Who This Tour Fits Best (and Who Might Want Extra Time)
- Price and Value: What $99.81 Buys You in Bruges
- Should You Book The Highlights of Bruges?
- FAQ
- How long is the private tour?
- Is this a private tour or a group tour?
- Do you get hotel pickup and drop-off?
- What language is the tour offered in?
- Are admission tickets included for all stops?
- Is food or drink included?
- Where does the tour start and end?
- What is the cancellation policy?
- Can I choose my start time?
Key Highlights You’ll Notice Fast

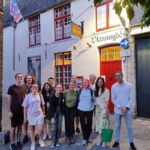
- Private means your pace: only your party, with time for questions
- Door-to-door convenience: hassle-free pickup and drop-off from your Bruges hotel
- Old Bruges politics in plain language: Markt, Belfry, and Burg Square connect the dots
- A route that mixes monuments and everyday trades: from the beguinage to the old tanner’s square
- Art and architecture without the overwhelm: short stops that point you to what matters most
- Local next-step tips: guides often share where to eat and what’s worth your time after the walk
Private Bruges in Two Hours: How the Tour Feels On Foot
This is the kind of tour that’s made for a first visit. You get a focused loop of key sights, and your guide stitches them together so Bruges doesn’t feel like a pile of postcard buildings. With a duration of about 2 hours, it’s long enough to learn what you’re looking at, but short enough that you’re still free to wander afterward.
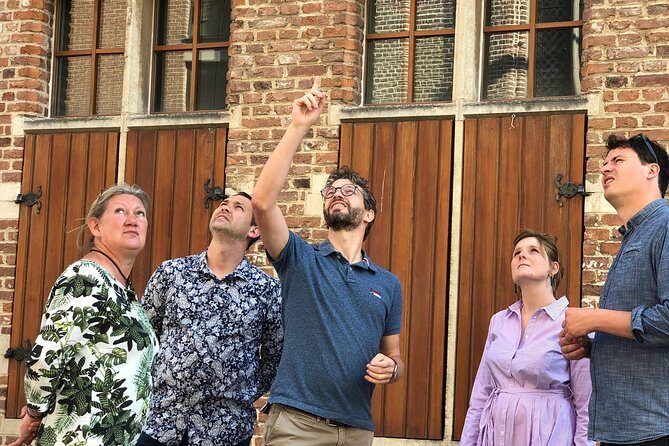
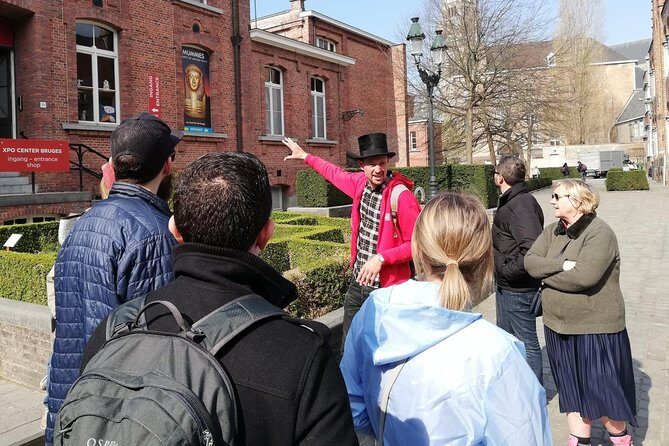
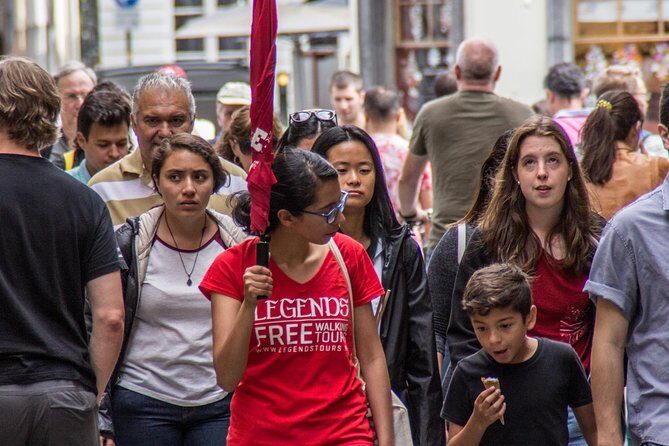
The private setup matters. In Bruges, the streets can be narrow and crowded, especially around markets and peak sightseeing hours. A private guide helps you move through the center with fewer pauses and more flexibility. Even if you’re with a mix of ages, this style of walking tour can work well because it keeps moving while still allowing quick stops for photos and questions.
You also don’t have to treat this like a logistics puzzle. Hotel pick-up and drop-off means you can start calmly and end right where you want. That’s real value in a city where getting “off your route” can cost time.
You can also read our reviews of more private tours in Bruges

What you should expect about pace
Stops are short and structured—roughly 10 minutes at many points, with a bit more at Minnewater Lake. That means you’ll get the story, not a long museum lesson. If you want deep, ticketed interior time, plan to add it later.
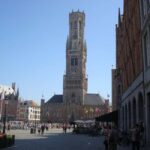
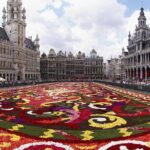
Starting at the Markt: Medieval Trading Power and French Pressure
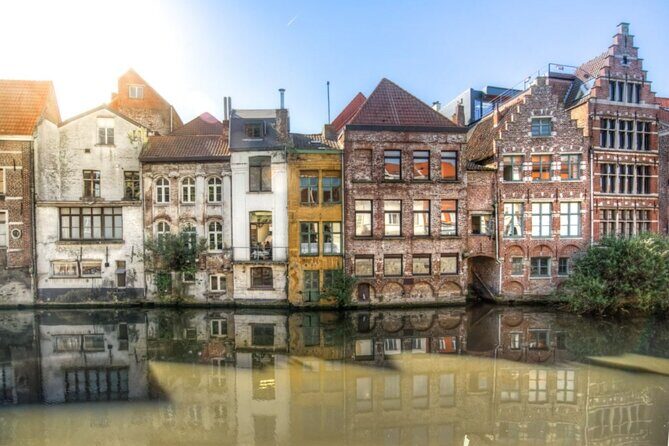
Your walk begins at the Markt, Bruges’ famous main square. This is where your guide typically sets the foundation: Bruges as a medieval trading powerhouse and how that wealth came with political friction. One specific thread you’ll hear is the city’s troublesome relationship with the French king—the kind of detail that makes the later buildings feel less random.
I like starting here because the Markt is the best place to understand Bruges’ “center of gravity.” It’s where you can orient yourself for the rest of the day. After the tour, you’ll also be close to a lot of cafés and viewpoints, so you can keep momentum.
Tip for your photos
From the Markt area, you’ll be well positioned to frame the city’s landmark architecture. If it’s windy or cold, get the “wide shot” early while your camera is already in your hand.
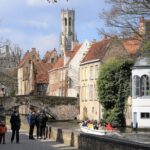
Belfort and the Halls Behind the Bellfry: Why the Tower Ruled the Middle Ages
Next is the Belfort area, where you get the story behind Bruges’ famed tower. The big idea here is that the bell tower wasn’t just decoration. It played a significant role throughout the Middle Ages, and your guide explains why the tower mattered in daily civic life.
You’ll also spend time around the halls behind the bellfry, which is a useful context stop. Towers can look like monuments, but when someone explains their function, you start noticing how Bruges communicates power in stone.
You can also read our reviews of more historical tours in Bruges


The tradeoff
This stop is short. If you’re the type who wants to spend a full hour inside ticketed interiors, you’ll likely need to add that on your own after this tour.
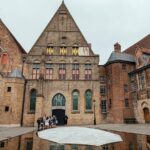
Gruuthusemuseum and St John’s Hospital: Wealth, Monopoly, and Care
Two of the most interesting stops come close together: Gruuthusemuseum and the Sint-Janshospitaal.
At Gruuthusemuseum, you’re introduced to a wealthy palace tied to a family in Bruges. The key theme is economic control: the family held a monopoly on a specific part of trade. That detail changes how you view the building. It’s not only pretty. It’s a monument to how money and influence moved through medieval Bruges.
Then you move to the hospital of St John. This is described as one of the oldest still existing hospitals in the world, and your guide frames it as a cornerstone of medieval society. Even if you’re not a history-nerd, the idea of a functioning hospital with deep roots makes Bruges feel more human. It’s care, not just castles and churches.
Practical note on museum and hospital entry
The data for this experience indicates admission for Gruuthusemuseum and Sint-Janshospitaal is not included. That doesn’t make these stops pointless; it just means you might want to decide in advance how much interior time you want to pay for.
If your budget is tight, focus on the storytelling value and use your own time afterward to pick one “must-go-inside” option.
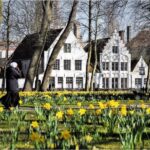
Ten Wijngaarde Beguinage and Minnewater Lake: 800 Years of Community and Love-Lake Legends
Then you shift from power and institutions to community life.
The Princely Beguinage Ten Wijngaarde is where you get a walk through a beguinage community that has lived together for over 800 years. It’s also described as the biggest of its kind in the world. The guide’s job here is to translate what you see into a clearer picture of daily life: women living together in a distinct, long-running social structure, right in the center of medieval Bruges.
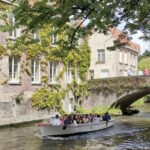
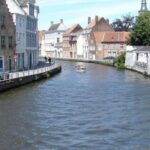
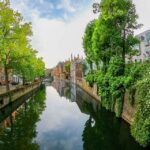
After that, you reach Minnewater Lake, often called the Lake of Love area. Here your guide tells two standout stories: why there are swans on the canals of Bruges and how the city got into a conflict with Emperor Maximilian of Austria. These are the kinds of connections that make a place feel more than a pretty backdrop.
Why these two stops work together
Beguinage life shows you “how people lived.” Minnewater adds “how stories got created,” including the kind of political tension that shaped the city. Together, they give Bruges an emotional timeline, not just an architectural one.
De Halve Maan Brewery and the Beer Pipeline: The Fun Side of City Nicknames
Outside De Halve Maan Brewery, you hear the story of why people in Bruges were nicknamed the Fools of Bruges. Your guide also points out a piece of the beer pipeline that flows beneath the city.
This is a stop that turns history into something you can picture. A beer pipeline under cobblestones makes the medieval city feel physical and real. It also offers a nice shift after church-and-palace stops. If you’re a beer fan, this leg can also help you choose what to do later.
What to expect if you want more
Admission is listed as not included here. So if you want a tasting or a deeper brewery visit, you’d plan that separately.
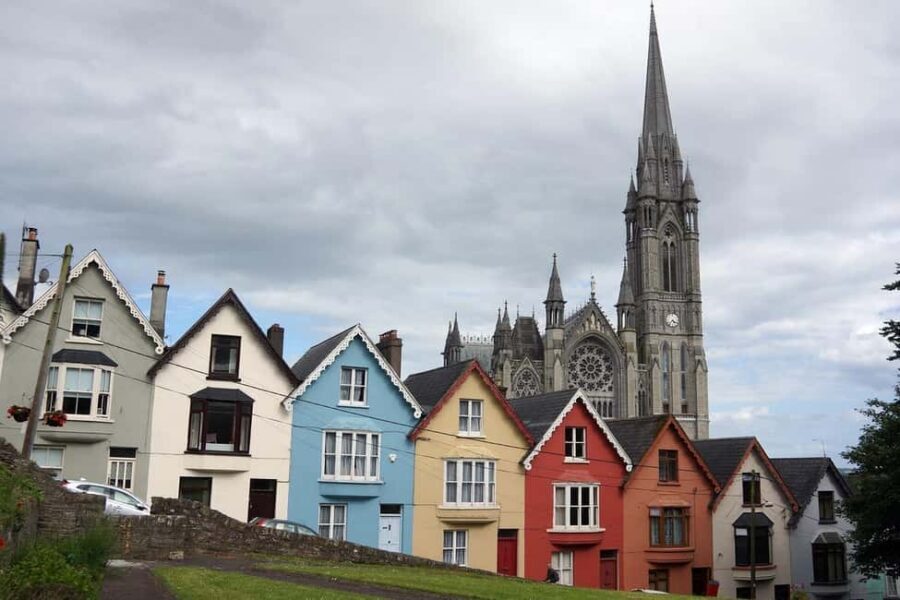
Onze-Lieve-Vrouwekerk: The Brick Tower, Michelangelo’s Statue, and Burgundy Power
One of Bruges’ most iconic landmarks on this route is Onze-Lieve-Vrouwekerk. Your guide connects three big attractions:
- It’s said to have the 2nd tallest brick tower in the world
- It houses a statue by Michelangelo
- It includes tombs of the last Dukes of Burgundy
When a guide ties those points together, you start understanding why this church is so important to Bruges identity. It’s not only a place of worship. It’s where art and political legacy meet.
The cost reality
Admission for this stop is listed as not included. You can still get the context from the outside, but if you want to see the statue and tombs, expect additional ticket time and money.
Groeningemuseum Garden and Huidenvettersplein: Art Gardens and the Leather Trade
This part of the walk is more “life around the edges,” which I really appreciate because it prevents Bruges from becoming purely monumental.
At the Groeningemuseum, you’ll spend time in the garden area where works of major Flemish masters are on display. Even a short stop here is useful because it helps you understand how Bruges bridges art and civic pride.
Then comes Huidenvettersplein, the old Tanner’s square. Your guide explains the leather trade: the work of greasing skins and turning them into leather. The key word here is trade. This is what “industry” looked like centuries ago, and it’s a reminder that medieval cities ran on very unglamorous labor.
Why these stops are worth the brief time
They add contrast. After seeing towers and churches, you get a sense of how ordinary businesses kept the city going. It also makes your later self-guided exploring more rewarding—you’ll notice the city’s working past in places you might otherwise walk past quickly.
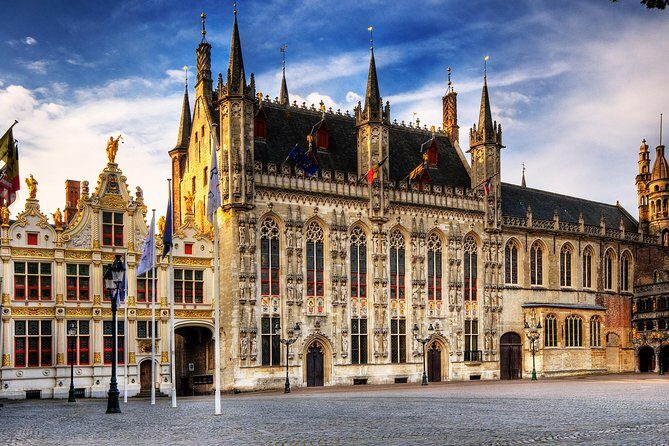
Burg Square: The Political Heart and Where Bruges Took Shape
You finish at Burg Square, the political heart and birthplace of Bruges, after passing the old fishmarket. This is a strong ending because it’s where the city’s civic story converges.
When your guide connects Burg Square back to earlier stops like the Markt and the Belfry, the whole route starts making sense. You’ll leave with a framework: how trade power, civic institutions, and ruling families shaped what Bruges looks like today.
After the tour, you’re positioned well for a next step—either casual wandering, a snack, or plugging your new “what to look for” skills into the rest of the city.
Who This Tour Fits Best (and Who Might Want Extra Time)
This tour is a good match if you want:
- A clear first overview of Bruges without planning a route
- A short walk that still covers the major anchors
- A guide who can share practical ideas for what to do next, including dining and museums
It also tends to work across ages and comfort levels. One family example in the provided feedback ranges from ages 9 to 75, and the common theme is a comfortable walking pace with plenty of chances to ask questions.
You might want something longer or additional ticketed time if:
- You’re the type who wants full museum immersion
- You want extensive indoor time at churches and major collections
- You’re arriving with strong expectations to spend half a day inside specific sites
Because the route is time-boxed at about two hours, it’s best thought of as your “Bruges map in motion.”
Price and Value: What $99.81 Buys You in Bruges
At $99.81 per person, the price may sound steep if you compare it to a generic group walking tour. But you’re paying for specific value:
- Private format: only your party, so you don’t lose time to crowd control
- Hotel pickup and drop-off: that saves energy and planning stress
- A local guide: you’re not just walking between sights, you’re getting the why behind them
- All fees and taxes included for the tour itself
The main value watch is admissions. Several stops list tickets as not included (like Gruuthusemuseum, St John’s Hospital, De Halve Maan Brewery, Onze-Lieve-Vrouwekerk, and the Groeningemuseum stop). If you plan to go inside multiple paid locations during the same morning, budget for extra ticket costs.
Still, even with extra tickets, this kind of tour often pays off because it helps you choose. After learning what’s most important, you can spend your money where it really counts.
Should You Book The Highlights of Bruges?
I think this is a smart booking if it’s your first time in Bruges or you want a structured orientation with real context. The private pacing, hotel pickup, and the tight route through the city’s power centers make it an efficient way to get your bearings fast. If you like your history tied to buildings, politics, and trade (not just dates), this route delivers.
Book it if you want:
- A calm, guided introduction that makes the rest of Bruges easier
- A route that mixes major monuments with everyday trade stories
- A guide who can point you to food and activities afterward
Skip it (or plan extra time) if you want long museum stays or you don’t want to deal with optional ticketed entries at multiple stops.
FAQ
How long is the private tour?
It runs about 2 hours.
Is this a private tour or a group tour?
It’s private. Only your group participates.
Do you get hotel pickup and drop-off?
Yes. Pickup and drop-off from your Bruges hotel are included.
What language is the tour offered in?
The tour is offered in English.
Are admission tickets included for all stops?
No. Some stops note admission tickets as free, while others specify admission is not included (such as Gruuthusemuseum and Sint-Janshospitaal, and several church/museum related stops).
Is food or drink included?
No. Food and drinks are not included unless specified.
Where does the tour start and end?
It starts at Pieter de Coninck en Jan BreydelMarkt, 8000 Brugge, Belgium and ends at Burg SquareBurg, 8000 Brugge, Belgium.
What is the cancellation policy?
Free cancellation is available if you cancel up to 24 hours in advance for a full refund.
Can I choose my start time?
Yes. You should mention what time you would like to start the tour.