REVIEW · GHENT
Private Historical Tour: The Best of Ghent
Book on Viator →Operated by Gent Free Walking Tour · Bookable on Viator
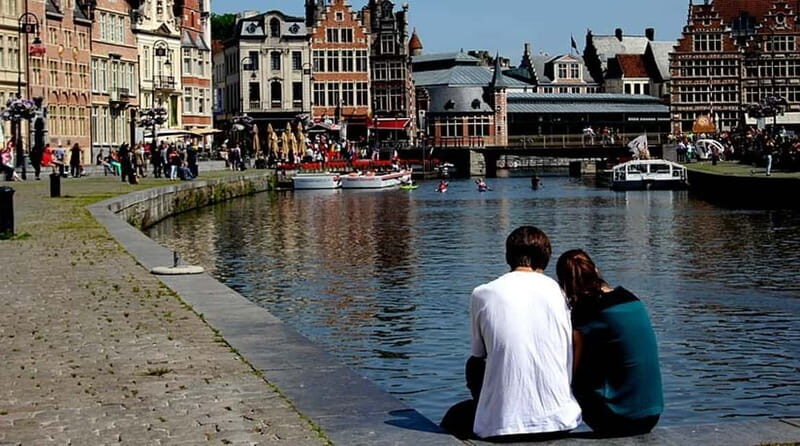
Ghent clicks into focus fast. On this private historical walk through medieval Ghent, you’ll hit the biggest landmarks in a tight route, with a guide who explains how the city’s power and stubborn character formed the skyline you see today. It’s built for an easy, high-impact overview of Gent’s heritage, from river trading scenes to civic buildings and cathedral art.
I especially like that it’s private to your group. That means questions don’t feel like an interruption, and you can slow down when cobblestones or crowds get annoying.
The other big win for me is how simple the logistics feel: hotel pickup and drop-off are included, and each stop is quick enough that you stay fresh for the whole route. One possible drawback: this tour reads like a guided walk-and-see plan, so if you’re expecting full interior access at every stop, you may find the value better if you also budget separately for any places you specifically want to enter.
In This Review
- Key Highlights You’ll Actually Feel on the Street
- Starting at St Michael’s Bridge: The Skyline Lesson First
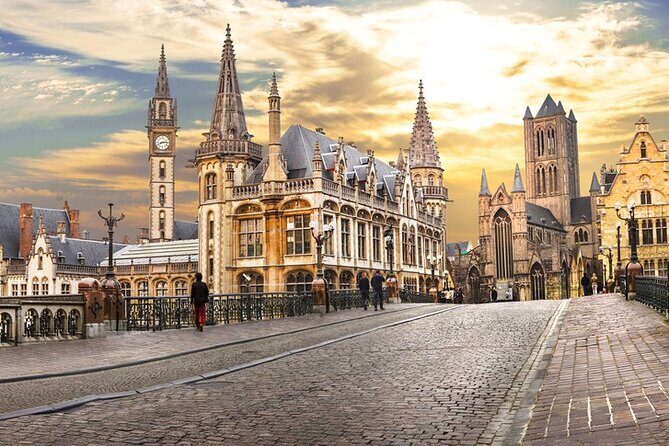
- Graslei and Korenlei: When the River Became Ghent’s Money Machine
- The Design Museum Area: Rebellion as a Ghent Personality Trait
- Het Groot Vleeshuis: Gothic Beauty with Darker Realities
- Gravensteen Castle: A Fortress Living Right in the City
- St. Veerleplein: Square of Death and Square of Life
- Huis van Alijn: A “God House” That Became a Hospital
- Vrijdagmarkt and the Man in the Middle
- Werregarenstraat: Street Art with Rules, Not Chaos
- Ghent Town Hall and the Confused Facade Explanation
- St. Bavo’s Cathedral, the Belfry, and the End at St Nicholas Church
- St. Bavo’s Cathedral
- Het Belfort van Gent
- The Finale: Esglesia de Sant Nicolau (St Nicholas Church)
- Price and Value: Is $105.82 Worth Two Hours in Ghent?
- What Makes the Guides Stand Out (From the Names You’ll Hear)
- Who This Tour Suits Best in Real Life
- Should You Book the Private Historical Tour: The Best of Ghent?
- FAQ
- How long is the private Historical Tour: The Best of Ghent?
- How much does the tour cost?
- Is this tour private?
- What language is the tour offered in?
- Where does the tour start and end?
- Are food and drinks included?
- Are admissions required for the stops?
- Can I cancel for free?
- Are service animals allowed and can most people participate?
Key Highlights You’ll Actually Feel on the Street
- Two hours, all the major “why Ghent matters” stops: St Michael’s Bridge to St Nicholas Church
- Local guide storytelling that ties buildings to how the city worked (and fought back)
- Photo-ready viewpoints for the skyline, canals, and the castle that sits inside town
- A street-art stop by design so the graffiti story has a real context
- Mostly quick stops (often 5–15 minutes) so you don’t burn your day just walking
- Private pacing: you’re not stuck behind a big crowd for every photo
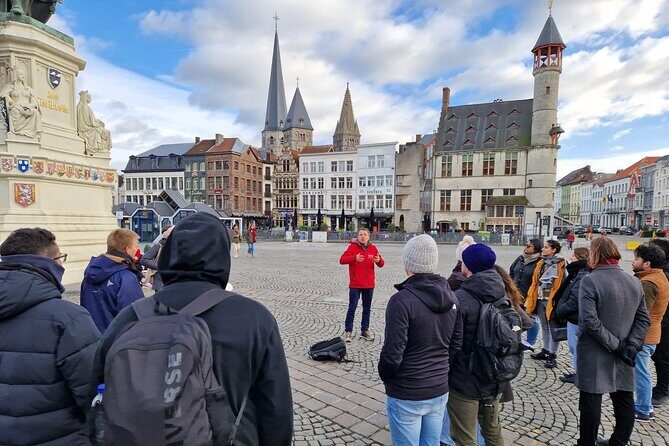
Starting at St Michael’s Bridge: The Skyline Lesson First
You begin at Hostel Uppelink on Sint-Michielsplein, then walk into the kind of view that makes Ghent feel legible fast. St Michael’s Bridge is more than a crossing. Your guide uses it to set up the medieval logic of the city: Ghent wasn’t just pretty and quiet—it was a trading hub, and the river mattered.
From here, you also get introduced to the three towers that shape the Ghent skyline. The trick is that you learn what to look for before you ever reach the towers themselves. Once the guide names them and connects them to the city’s civic and religious identity, the rest of the walk starts clicking into place.
Practical note: the first stop is about getting bearings, not collecting facts. If you’re the type who likes an orientation before sightseeing, this start helps a lot.
You can also read our reviews of more private tours in Ghent


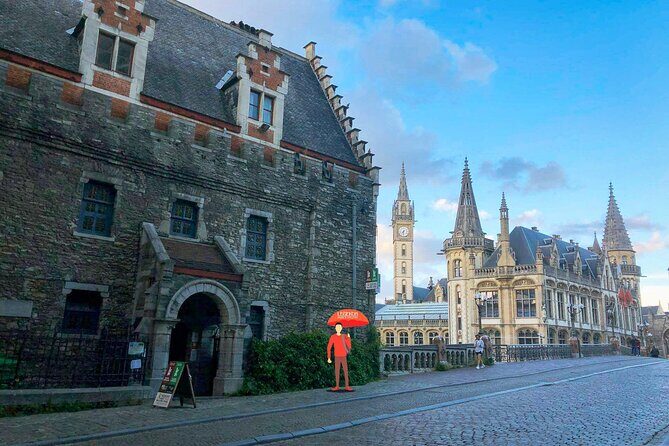
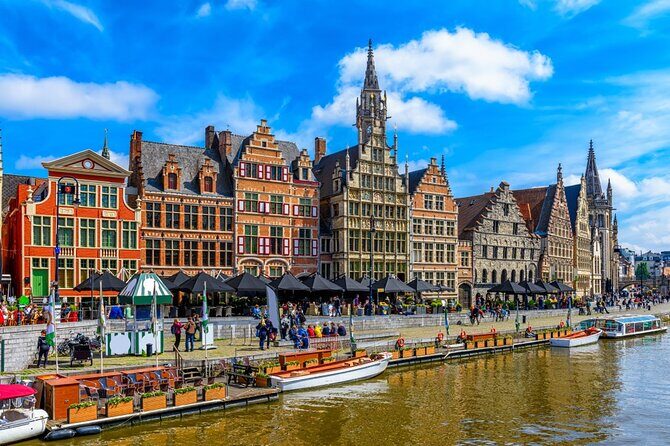
Graslei and Korenlei: When the River Became Ghent’s Money Machine
Next comes Graslei and Korenlei—the beating heart of the historical city centre. These waterfront squares are where Ghent’s trading days become visible in architecture. Your guide points out which buildings were tied to the port and the commerce that fed the city’s growth.
This is one of the stops where you’ll feel the difference between seeing “old buildings” and understanding what the river meant. You’re not just taking photos; you’re learning how the city operated: where goods moved, who benefited, and why this area stayed important.
If you enjoy historical city planning (or you just like knowing why places look the way they do), this portion is worth paying attention to. It’s also a solid place to catch your breath, since the stop is short and focused.
The Design Museum Area: Rebellion as a Ghent Personality Trait
Between the waterfront and the Butchers’ Hall, there’s a stop connected to the Design Museum area, with an explanation of why a particular design element symbolizes the stubborn, rebellious mindset of the Gentenaars.
Even if you don’t go inside a museum, this kind of stop works well on a walking tour because it turns an abstract idea—rebellion—into something you can physically point at. It’s also a reminder that Ghent’s story isn’t only about power and guilds. It’s about attitude, and how people decided to keep their independence.
If you like tours that connect modern symbols to older behavior, you’ll probably enjoy this intermission.
Het Groot Vleeshuis: Gothic Beauty with Darker Realities
At Het Groot Vleeshuis, you’ll stand looking across the water toward the medieval covered Great Butchers’ Hall. It’s a striking building from the outside, and the guide adds the darker facts behind the majesty.
This stop matters because it balances the tour. Earlier you’re learning about trade and civic pride. Here, you see that Ghent’s prosperity also came with hard work and grim realities. That contrast is what makes the city feel more human and less like a postcard.
You’ll likely want a few extra seconds for the details—stonework, scale, and the way the hall fits into the river view—because the guide’s explanation helps you “read” the façade.
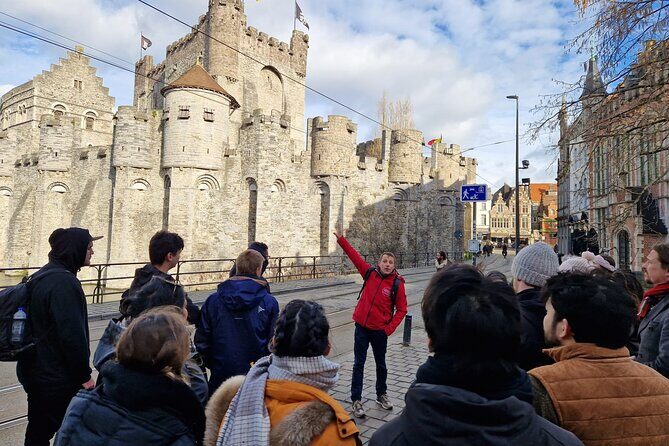
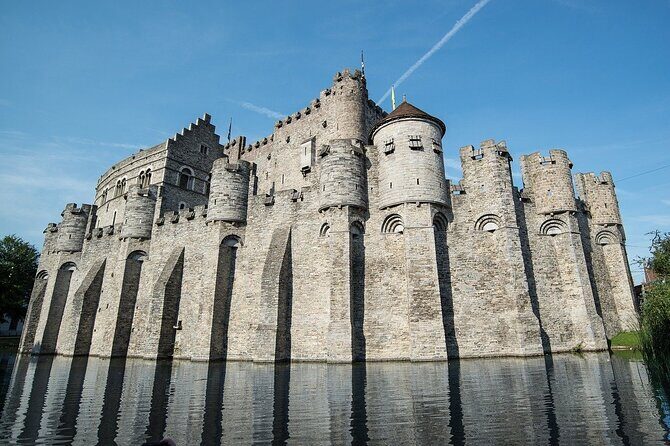
Gravensteen Castle: A Fortress Living Right in the City
Then you hit Gravensteen, the medieval Castle of the Counts. Unlike castles that sit far outside town, this one is right in the middle of Ghent and is very well preserved.
Your guide explains the castle’s impressive past and why it stayed so central. Standing here on the ground-level streets, it’s easier to understand that power in medieval cities wasn’t always behind walls way off in the countryside. Sometimes it was embedded in everyday life.
If you’re wondering how to photograph a “castle feeling” without leaving the city center, this is your answer.
You can also read our reviews of more historical tours in Ghent


St. Veerleplein: Square of Death and Square of Life
Right in front of the castle is St. Veerleplein, and yes, it carries the dramatic nickname “square of death” and “square of life.” The guide explains why.
What I like about this stop is that it gives you a city myth or historical interpretation that you can connect back to the castle and nearby civic spaces. It also keeps the pacing moving. You’re only there for about 10 minutes, but you leave with a story you can repeat.
If you enjoy local legends that aren’t just made-up for tourists, this is a good moment to pay attention.
Huis van Alijn: A “God House” That Became a Hospital

Next is Huis van Alijn, a building with serious character. Your guide explains that it was once a hospital and that it’s the only remaining “god house” in Ghent.
This stop adds a different angle to the walk: social care and how communities organized help. It’s not just wars and politics. It’s also the systems people used when life got hard.
Even if you don’t know much about medieval charity, the guide keeps it grounded in what the building was used for and how the purpose shaped its identity.
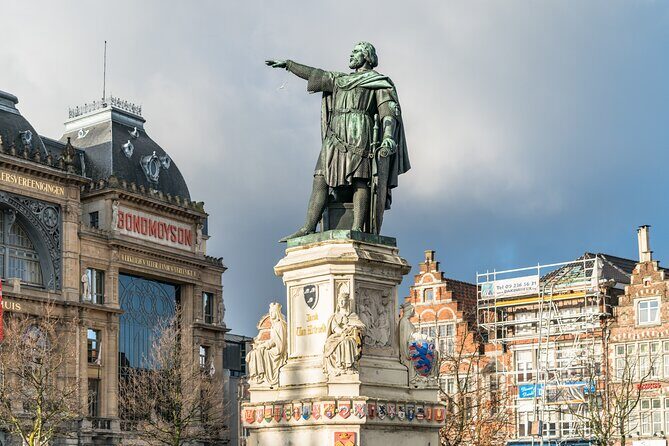
Vrijdagmarkt and the Man in the Middle
Vrijdagmarkt is another highlight, and it’s more than a scenic square. Your guide ties it to key moments in Ghent’s history and explains the man whose statue sits in the middle.
This is one of those spots where it’s easy to pass quickly if you’re not given context. With context, the square becomes a map of power: who was honored, what that says about the city, and how these spaces worked in daily life.
If you like tours that give you a “reason to care” for statues and public squares, you’ll likely appreciate this stop.
Werregarenstraat: Street Art with Rules, Not Chaos
Then comes Werregarenstraat, introduced as a designated area where street artists can go wild without spraying the rest of Ghent’s monumental buildings.
I like this stop because it takes a common tourist question—why graffiti exists in one place and not everywhere—and answers it with city policy and care for heritage. It’s also a modern contrast to the medieval focus of the rest of the route.
If you’re traveling with teens or anyone who likes street culture, this is a smart pacing change before the final big-ticket landmarks.
Ghent Town Hall and the Confused Facade Explanation
You finish the middle stretch at the Ghent Town Hall (Stadhuis). Your guide explains why the city hall looks a little “confused,” connecting it to the most significant conflict in Ghent’s history.
That phrase—confused—works because it’s visual. You can see the mismatch, the structure, and the odd mix of elements. But without guidance it’s easy to shrug and move on.
Here you’ll learn how architecture can act like a record of disagreement, rebuilding, and compromise.
This stop is short (about 5 minutes), so it’s not meant to slow you down. It’s meant to give meaning fast.
St. Bavo’s Cathedral, the Belfry, and the End at St Nicholas Church
The last part of the tour turns into a concentrated story about Ghent’s spiritual center and civic pride.
St. Bavo’s Cathedral
You’ll stand at St. Bavo’s Cathedral and hear about its rich background and the art treasures it houses—most notably the world-famous Ghent Altarpiece by the brothers Van Eyck. Even if you don’t go inside during the tour, the guide’s explanation helps you understand why this cathedral is a big deal far beyond Belgium.
This stop is about linking Ghent’s medieval power to art that still pulls visitors in.
Het Belfort van Gent
Next is Het Belfort van Gent, the Belfry—described as the people’s tower. Your guide connects it to stubbornness, power, and independence. You also learn that the façade tells a story related to its time as a prison, plus a bizarre legend shared by the guide.
I like this stop because it’s a people-first monument. It’s not just royalty and church. It’s civic identity turned into stone.
The Finale: Esglesia de Sant Nicolau (St Nicholas Church)
Finally, the tour ends at the Belfry area, with the last stop at Esglesia de Sant Nicolau. Your guide explains the early 12th-century charm of the building and that St Nicholas—protector of merchants and sailors—is its patron saint.
The façade includes the legend tied to that patron saint, giving you a rounded ending to the whole walk. It’s a fitting close because the tour started with trade and ends with merchant protection and symbolic storytelling.
Price and Value: Is $105.82 Worth Two Hours in Ghent?
At $105.82 per person for about 2 hours, you’re paying for three things: a private guide, a tight route, and service elements included in the experience.
Here’s what makes the price feel more fair:
- Private format: you’re not waiting while a big group shuffles. One guide flexibility angle that comes up in feedback is how guides adjust pacing and even end locations to match your plans.
- Pickup and drop-off: in a walk-heavy city center, that saves time and mental energy.
- Curated focus: instead of random wandering, you learn how Ghent’s trade system, civic power, and legends connect.
What might make it feel steep:
- It’s mostly a “see it and learn it” walk. If you’re expecting the tour to include entrance fees everywhere, you could feel boxed out. One concern that shows up in feedback is that some people expected more access or extra inclusions.
My practical advice: book it when you want a strong overview quickly, especially if it’s your first time in Ghent or you only have a limited window. If you’re a museum-hopper who wants lots of paid interior time, you may want to pair this with a self-guided museum or cathedral entry afterward (only if you personally care about those interiors).
What Makes the Guides Stand Out (From the Names You’ll Hear)
The consistent praise in the feedback isn’t just about facts. It’s about how the guide teaches.
Names that show up across the experience include Kenny, Sophia, Camila, Hans, Martin, Onur, Arn, Julien, Sonia, Alex, Sebastian, Kasia, Maria, and Greta. What I take from that pattern is this: the tour tends to be led by locals who enjoy turning landmarks into stories you remember.
You’ll also notice a repeated theme of humor and interactive energy. Some guides use light challenges during the walk, and others add helpful restaurant recommendations for after the tour—exactly the kind of practical support that makes the day feel smoother.
On the downside, no business is perfect. A small number of comments mention issues like late timing or a guide not showing the right level of attention. If that kind of thing would stress you out, plan to keep your schedule flexible and not stack this tour right before an inflexible reservation.
Who This Tour Suits Best in Real Life
This tour is a great fit if:
- you want Ghent highlights with context without spending the day researching
- you prefer private Q&A over a crowded group vibe
- you like learning why squares and buildings look the way they do, not just what they’re called
- you have limited time and want a clean route from river trading spots to the Belfry
It may be less ideal if:
- you want long interior visits and paid admissions built into the itinerary
- you’re chasing a very slow pace with lots of stops for photos every 2 minutes (this one is structured by design)
Should You Book the Private Historical Tour: The Best of Ghent?
Yes—if you want a smart, story-driven walk that gives you the “why” behind Ghent’s famous landmarks in a short time. The private format and hotel pickup/drop-off make it easy, and the route hits the big monuments people come for while still explaining the city’s personality: trade, independence, and the stubborn streak that shows up again and again in stone and signage.
I’d say go for it particularly when Ghent is high on your list and you don’t want to waste time trying to figure out the connections on your own. If you’re hoping for a tour that guarantees full interior access everywhere, read your expectations carefully and plan to add any extra entries yourself.
If you like history that walks with you step by step, this is the kind of tour that helps Ghent feel clear by the time you reach the Belfry.
FAQ
How long is the private Historical Tour: The Best of Ghent?
It lasts about 2 hours.
How much does the tour cost?
The price is $105.82 per person.
Is this tour private?
Yes. It’s private and restricted to your group only.
What language is the tour offered in?
It’s offered in English, and the experience is available in multiple languages.
Where does the tour start and end?
It starts at Hostel Uppelink, Sint-Michielsplein 21, 9000 Gent, and ends in front of the Belfry of Ghent (Sint-Baafsplein, 9000 Gent).
Are food and drinks included?
No. Food and drinks are not included unless specified.
Are admissions required for the stops?
The listed stops are marked as having admission ticket free.
Can I cancel for free?
Yes, free cancellation is available. You can cancel up to 24 hours in advance for a full refund.
Are service animals allowed and can most people participate?
Service animals are allowed, and most travelers can participate.